One of the main benefits of using HubSpot is the myriad of tools available to implement, control and track your inbound marketing business strategy. The Inbound Methodology teaches that one of the most important factors on how we should communicate with potential, or current, customers is their current lifecycle stage.
What is lifecycle stage? I’m glad you asked! This is a Hubspot term that is used to clearly label where contacts are within your marketing funnel.
Why do you want to setup lifecycle stages? If we dig a little deeper we realize that these stages are intended to help track how your leads are moving through your buying cycle. This makes segmenting clients and leads much easier when it comes time to communicate with them via email or smart forms. Another benefit is Hubspot’s ability to monitor these leads via social media providing the capability to provide almost immediate customer service.
Now that you (hopefully) understand the benefits of creating lifecycle stages in your Hubspot portal, let’s go over the steps for actually setting them up.
Step 1
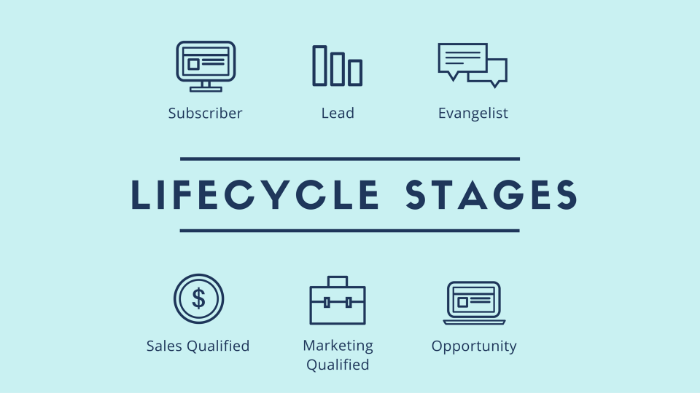
The first step is to identify the lifecycle stages that leads can flow through. There are 8 stages and they are recognized in the following order (from the top of the funnel to the bottom):
- Subscriber
- Lead
- Marketing Qualified Lead
- Sales Qualified Lead
- Opportunity
- Customer
- Evangelist
- Other
Step 2
For each lifecycle stage, sit down and ask yourself the following questions:
- Who are these contacts?
- What are all of the activities that someone in this particular stage would do?
- What differentiates this stage from the previous or next one?
- What is the goal of this stage?
- What is the best way to accomplish that goal?
You will probably find that this will go something along the lines of:
- Subscriber:
- These are the people who are aware of your brand and have opted in to get periodic updates directly from you. They are usually signed up for newsletters and/or blogs only. The goal with this lifecycle is nurturing. The best way to nurture them is via relevant content that can increase their likelihood to move into the next lifecycle. In Hubspot, anyone who subscribes to your blog is automatically added as a Subscriber, but you can also update anyone’s lifecycle stage at any time.
- Lead:
- The next stage in the funnel is when someone becomes a Lead. So what differentiates a Lead from a Subscriber? The main difference is that a lead has now provided more information than simply their email; this was usually provided in order to obtain a top of the funnel offer (TOFU.) This group has not only shown interest in your blog content but is also interested in seeing what other standards your brand can offer and is willing to provide some personal information to obtain said content.
- Marketing Qualified Lead
- Who is a marketing qualified lead (MQL)? These are the contacts that have shown significant interest in your product or company but have not yet been vetted by your sales team. They are different from subscribers or leads because they have at this point probably requested a bottom of the funnel offer (BOFU) such as a demo request.
- Sales Qualified Lead
- What separates a Sales Qualified Lead (SQL) from an MQL is whether or not your sales team believes this contact is ready for an official sales touch base. Knowing the number of contacts in this stage goes a long way in making sure that both sales and marketing are in agreement on the success of any campaign or period.
- Opportunity
- Once the SQLs have been vetted by the sales team, they become sales opportunities which will hopefully move into the next and very important stage. The goal here is to properly nurture them into becoming
- Customer
- As the name implies, this is the main lifecycle stage we are all working towards; this is when someone hires you to do the work or provide the service you’re promoting.
- Evangelist
- Have some clients begun to send their friends and family to you for business? Awesome! They have now become a true evangelist for your brand. The goal for this stage would be to gain more leads from these contacts’ various networks.
- Other
- This lifecycle stage is just a place where anyone who does not fit into any other stage goes. Some examples include: lost leads/opportunities, closed accounts, unresponsive contacts, etc. This last stage shouldn’t be ignored; your goal should be to understand why/when they moved into this stage. Once you have that information, analyze it to create plans on how to identify and deal with contacts before they arrive here.
Step 3
For current contacts
Once you have answered the questions in the previous step you are ready to create a list in your portal with the corresponding lifecycle stage as the main criteria.
You can find list creation tool by going to the following drop down: Contacts > Lists.
Once on this page on the top right you will see the buttons to either import or create a new list.
Click on the blue “New list” button and that will bring up the following options on the left side of your contacts window.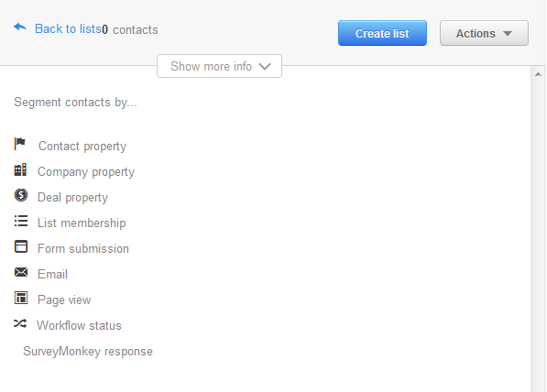
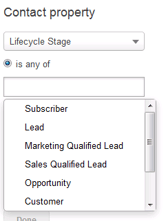
Lifecycle stages can be found by selecting the “Contact property” segmentation option under “is any of.”
Pick the stage you are segmenting and click “Done.”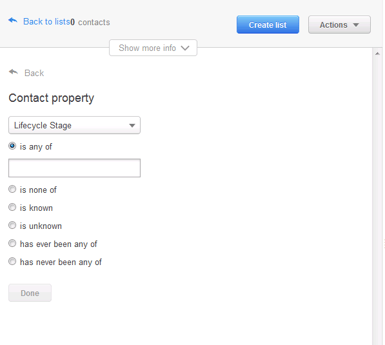
This brings you to a preview of the contacts that will be included; it is also where you are able to add any additional list requirements or convert it into a Smart or Static list.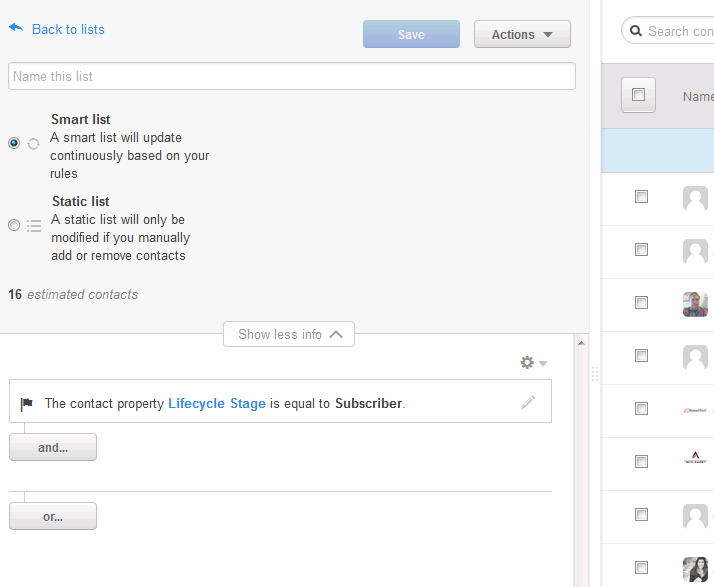
Your new list will now add current contacts that fall under the stage you selected.
For new contacts
If you made the list “smart,” then any new contacts that move into that stage will be automatically added. However, as mentioned before, if you find the need to add/move anyone manually here is how to do it.
Rinse and repeat these steps for each lifecycle stage. You are now ready to easily identify and target your contacts with personalized content and offers based on their stage. If you need additional assistance in understanding, identifying or setting up your stages feel free to reach out to us or download our Modern Marketing ebook below and learn even more.
